Geometry, shape and position check (GD&T)
These days, adherence to design production tolerances of components is of great importance in production.
This also affects the assembly and installation of multiple components, where checking the dimensional accuracy has the highest priority.
The various measurement processes are used to ensure functionality later. It should also ensure that components are the least prone they can be to failure during use
Examples:
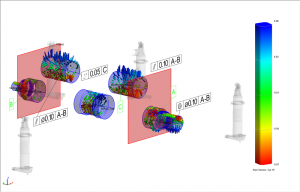
- Concentricity of a shaft
- Parallelism of rollers
- Planarity and perpendicularity of stamping machines
The checks often begin with the smallest components and continue through the complete production and installation cycle of machines and plants.
Checks can be carried out against design target data from various sources:
- Details from 2D drawings
- Details from 3D design files from, for example, CATIA, SolidWorks, Unigraphics, etc.


